Tuesday, April 10, 2012

Working away ...

I’ve been working away at several projects during the last month, in between trips to Southern Illinois. My mother has been battling pneumonia since February and has been in and out of hospitals and a nursing home. She is getting good care, but she smoked for years and has chronic pulmonary disease, so her prognosis is not good. In between trips to see her, I made her this appliqued and quilted pillow:

My sister Joan and I told her that the pillow just “pulls the whole room together,” and we had a good laugh over that one. Not much you can do to make a hospital room more cheerful, but I tried with this pillow. She really liked it, almost as much as the stuffed dachshund Joan gave her! Mom loves dogs, in particular the three doxies owned by my sister Maribeth, and she misses them.

I also finished the Piece and Plenty Quilt Guild Winter Challenge: Women and Peace. The challenge was to use a bright orange batik fabric and the peace symbol in a quilt 40-inches square or smaller. I started with the border, a rainbow of 2½-inch strips I had sewn together for another (failed) project:

I cross-cut the strips to make squares, arranging them in a stair-step pattern. Then I appliqued a 20-inch block for the center. I wanted a sort-of hippie look—peace and love and all that. Patterns for the tree, birds, sun, and peace sign came from www.weefolkart.com (free). I was going to draw all this, but I knew I would run out of time. I searched for a peace sign pattern, and up popped Wee Folk Art. Their art has just the right whimsical look I was looking for, so why reinvent the wheel? Here is the finished quilt:
I call it “Peace, Love, and Sunshine.” I am happy with the result, and I won 2nd place in the challenge. The quilt has been on display at a local shop this past month.

I also made a quilted computer case for my daughter by strip piecing various upholstery fabrics. I started with a pattern, but soon abandoned it and did my own thing:


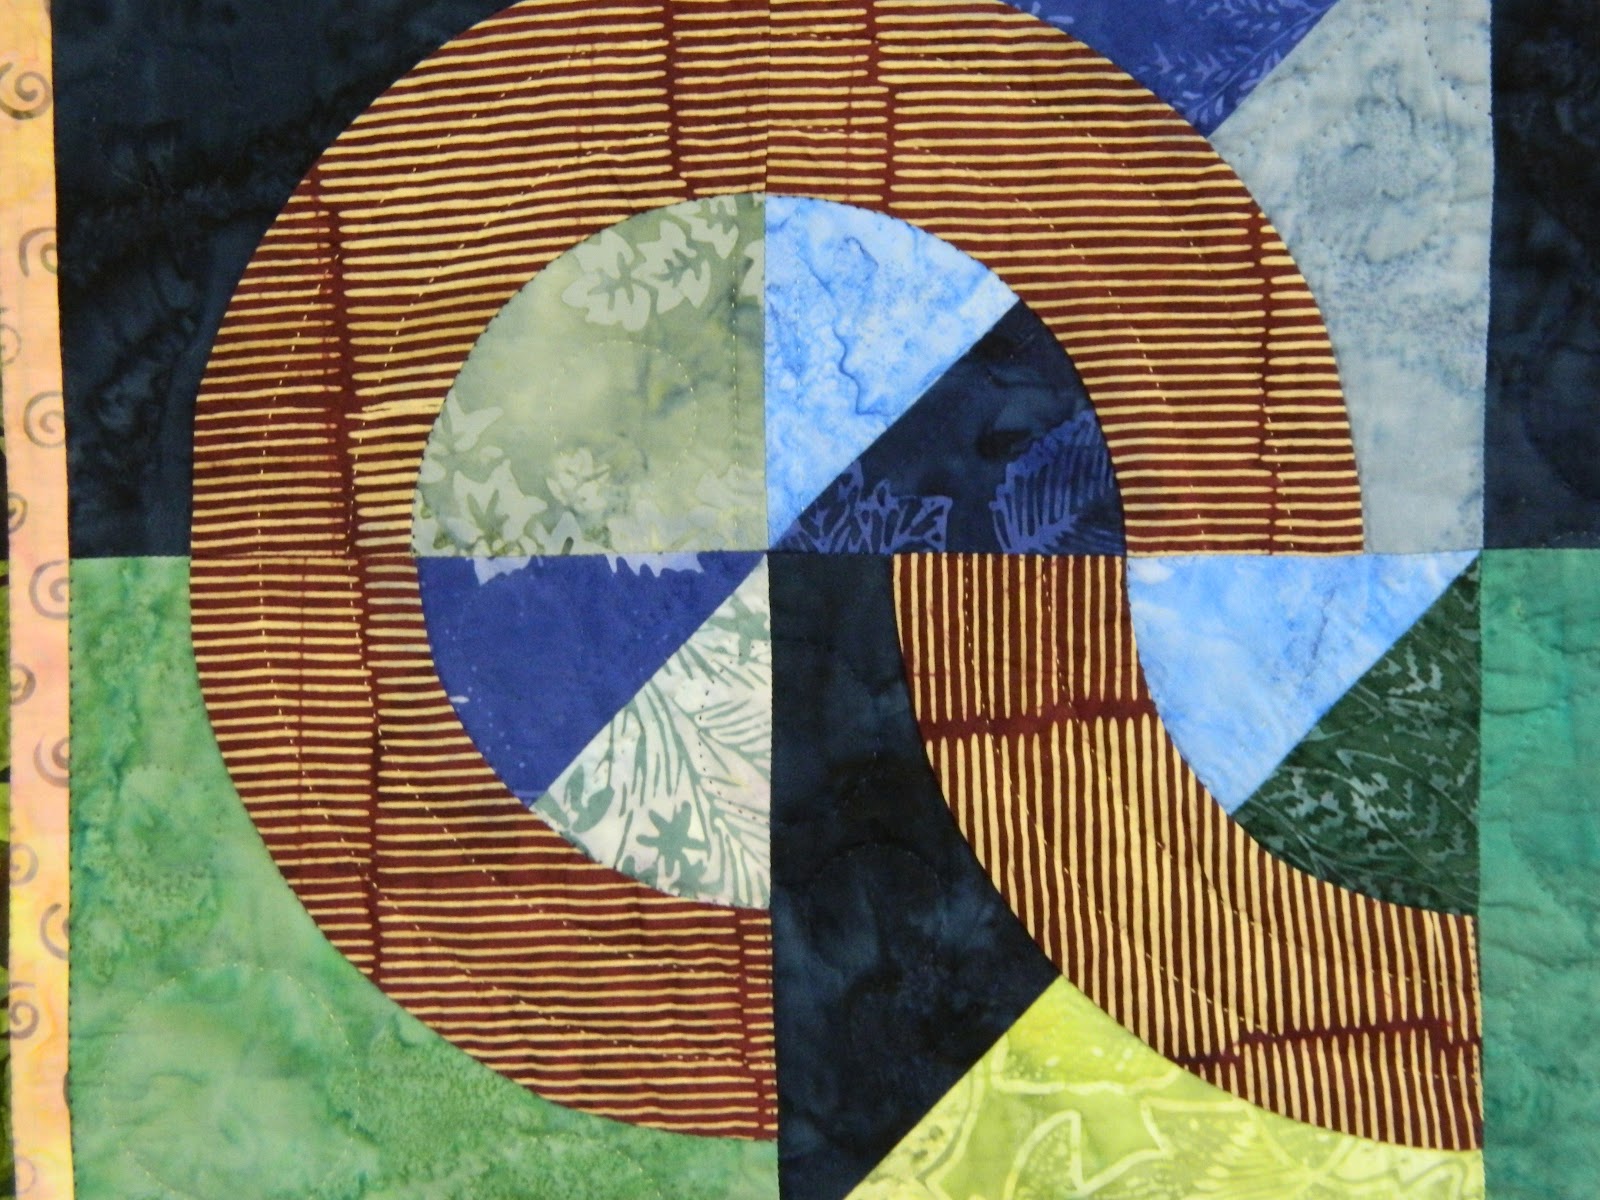
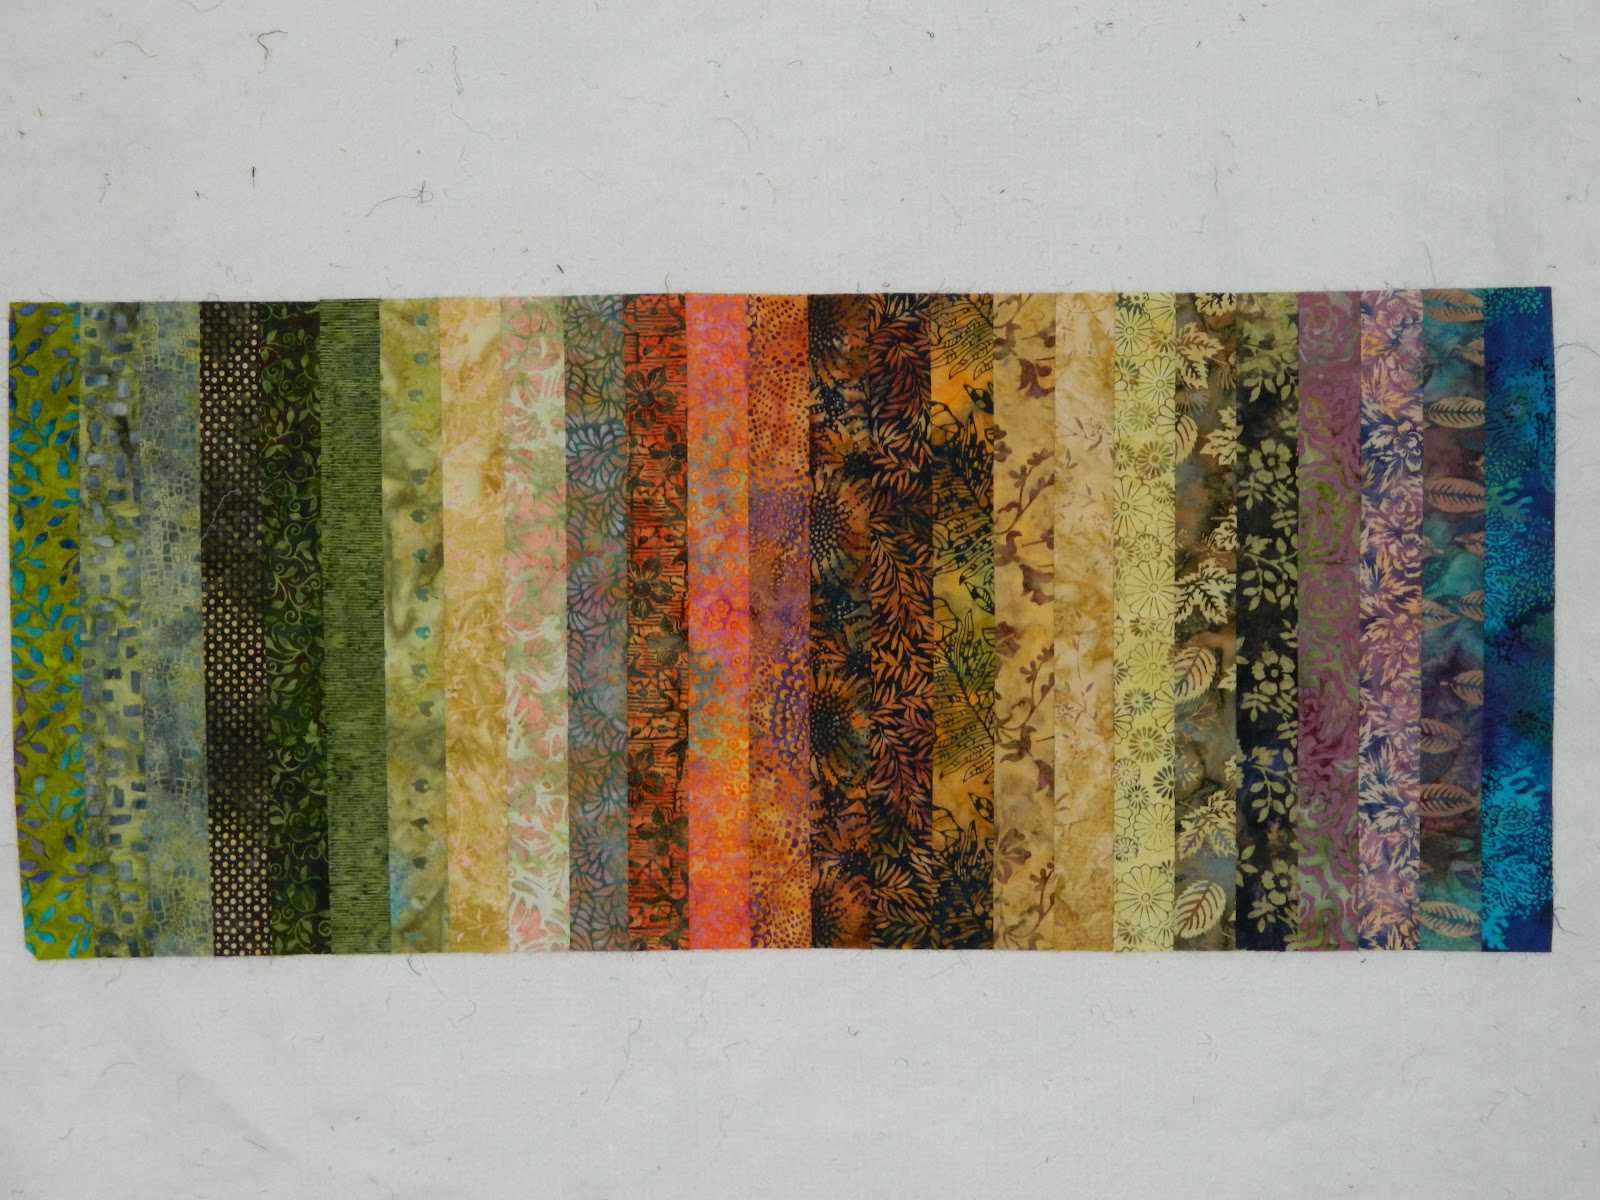
Finally, I finished Part 2 of American Quilter Magazine’s latest Mystery Quilt, called Rainbow Rotini. Below are the 12 blocks from Part 2. Now I put it away and wait for the final installment in the July issue of the magazine.

Wednesday, March 7, 2012

Best news ever!


My small wall quilt, Waterwheels III, has been accepted for entry in the American Quilter’s Society Show & Contest in Paducah, Kentucky, in April! (Scroll down to see a full picture in my post from Jan. 28.) I am very excited about it, especially since I entered the quilt sort of at the last minute. I originally planned to enter a larger quilt in the same pattern, but it wasn’t finished. So I submitted Waterwheels III instead. Here is a different close-up of the quilt:


Monday, February 27, 2012

Making coasters

I’ve been working on multiple projects this month, including these clever coasters. I made sets of six and sent them off to my daughters for Valentine’s Day.

Here’s how to make them: For each coaster, you need two 5-inch squares of fabric, one 5-inch square of batting, and four additional smaller squares, which can measure 4 or 4½ inches. In the example below, I used 4½ -inch squares. Fold these 4 smaller squares in half on the diagonal and iron the crease. Layer your 5-inch squares with the batting in the middle, shown below at bottom right.


Place the folded squares (now triangles) on top of your 5-inch squares as shown below, matching up the corners and tucking the end of the fourth triangle under the first one.


At this point, I put in a few pins because the layers tend to shift while sewing. I also use a stylus to hold down the layers as I sew around the outer edge, pivoting at the corners. I sew 1/4-inch away from the edge.

The result is shown below, on the left. Trim the corners, shown on the right.

Turn the triangles to the other side of the coaster, gently poking the corners out with a point turner. I have a fancy point turner (the one marketed by Alex Anderson), but I like my simple bamboo one the best. Below you can see the coaster before pressing (on the left) and after (on the right).


There is a small opening in the top of the coaster, which you can leave like that or sew closed with decorative stitches. The larger the triangles, the smaller the opening. In the batik examples in the above pictures, I used 4½-inch squares to make the triangles, which leaves a very small hole in the center. Don’t use squares any bigger than this because you will be sewing too many layers into the corners and the coasters will be impossible to turn. In the examples below, I used 4-inch squares for the triangles. This creates a slightly bigger hole in the center, which I closed with a buttonhole stitch.


That’s it! You can come up with all sorts of interesting color combinations or match these to your décor. It’s a great way to use up scraps of batting or leftover squares from charm packs.

Saturday, January 28, 2012

Two projects--finished!

Hurray! I finished two projects I’ve had going for some time—a great feeling, since I work on multiple projects at once and frequently put them aside if I get bored or reach a design problem I need to think about for a while. That means I have a stash of projects in various stages of completion. It doesn’t really bother me; I think I even like having unfinished work I can pick up when the mood strikes.

I finished these placemats for my daughter Libby. I bought the fabric in Colorado last summer and immediately cut out 2-, 4-, and 6-inch squares, the simplest of shapes. I looked at placemat patterns, but decided that if I made all of them the same, I would get bored and have another unfinished project on my hands! Instead, I experimented with different arrangements of the squares in each placemat. I also made half-square triangles from the 4-inch squares and arranged them in pinwheels, and I used 1-inch filler strips. These are machine quilted with a walking foot.


I had put these placemats aside after they were pieced but before they were quilted because of weddings, then Christmas, the urgency of other projects, and you know how it goes.  Next I plan to make matching coasters, so look for a little package in the mail from me, Libby!

After TWO YEARS of off-and-on hand quilting, I finished this quilt, Water Wheels III. These are leftover pieces from a larger Water Wheels quilt, as yet unquilted. Yes, this is the third in a series, and I can say that I have curved piecing down pat.


Batiks have a firmer hand—they are a little stiffer, more tightly woven—than other cottons, and these were no exception. So someone STOP ME before I ever attempt to hand quilt another batik project. This small wall quilt is only 40 x 40 inches. Weirdly, I added the final border with that tiny strip of yellow AFTER the rest of the quilt was finished. (Nothing like changing the design of your quilt after it’s done!) Amazingly, this quilt turned out perfectly flat. Here is a close-up of the quilting.


What did I do after finishing these two projects? I created more projects, of course. My quilt guild has a Christmas group, and I joined it because I want motivation this year to make 4 Christmas tree skirts—one for each of my 3 daughters and one for myself. I bought fabric at after-Christmas sales and cut out pieces for all 4 of the skirts, which took almost two days. Now I have a nice backlog of Christmas projects I can pull out when the mood strikes me. I love my unfinished projects!

Monday, January 23, 2012

New sewing machine

My sewing machine broke before Christmas. I pressed the backstitch button, heard a pop and a clunk, and could only go forward after that. I managed to finish the two wall hangings I donated to a Christmas fund-raiser, but then I gave it up and put the machine in my car. I drove 80 miles over two-lane roads to the nearest Bernina dealership, Top Stitch Sewing Service near Barnett, Missouri, which is near Versailles, which is near Jefferson City. (Yes, it's rather remote. I saw a bald eagle on the way.) Although Timothy (the owner) and his staff are as nice as they can be, I am always overwhelmed when I walk in. So many sewing machines! So much thread! So many notions!


$200 later, I came out with 6 spools of thread, Diane Gaudynski's book, "Guide to Machine Quilting," and a Daylight floor lamp I've been wanting. I wandered around and LOOKED at the new machines, but why, oh why didn't I try out any of them? I knew I would be in the market for a new machine this year--it's well past time. But I just looked. Some of those machines are SO intimidating. I wasn’t really sure I wanted a computer that sews, or if I could handle one.


Back home, I put my last-minute Christmas presents on hold and actually had to vacuum my sewing room! I also put up this beautiful pegboard system behind the door to hold my rulers and various other items.

When I went back to Top Stitch to pick up my repaired machine, I was determined to be brave and try out a new “sewing computer.” Well, I bought one—a Bernina Artista 640. It happened that fast. Timothy is a good salesman—the best. “If you’re thinking about a new machine in the next year, you should buy it now, because Bernina has no-interest financing until Dec. 31….” That did it.


I said good-bye to my old Bernina 1230, which I had for 22 years. After Christmas, I sent it off to Colorado with my daughter. It has a lot of happy sewing left in it. I ordered a new table insert for my sewing cabinet, but it didn’t fit properly and will have to be sent back. I’m tired of losing pieces and pins down the empty hole. But that hasn’t dampened my enthusiasm for this new sewing machine. It has features I never knew I needed, but that I LOVE—it cuts the thread at the end of a line of sewing, and it has a self-threading feature. I just used the pre-set button sew-on program—easy as pie. I’ve read the entire manual except for the embroidery part and am ready for my weekly lessons back at Top Stitch (the lessons come with the machine).


I also bought a new pair of hiking boots, and I've been using them, too. Here I am with my daughter's pups at Mill Creek Recreation Area.


And a self-portrait at Paddy Creek Wilderness. It's a long way down to the river off that big rock in the background!

Wednesday, December 14, 2011

Sewing away ...

I let out the cat and couldn’t go back to sleep. There’s nothing like a little insomnia to make me sit still long enough to update my blog. Now that I take time to think about it, I sure have been a busy woman! This fall, after my daughter’s wedding, I put on a quilt show, visited Indianapolis with my daughter and granddaughter, helped my sister with another wedding, celebrated Thanksgiving, and finished my Christmas shopping early. And I’ve been sewing—a lot.

After the quilt show, I picked up my daughter and granddaughter in Tennessee, and we hit the road to visit dear friend Ellen in Indianapolis. Ellen likes red, and this is the quilt I made for her, called “Red Potpourri”:


It is a version of Kaffe Fassett’s Yellow Potpourri quilt from his book Simple Shapes, Spectacular Quilts. Very simple to construct—3-, 6-, and 9-inch squares. Since I can never leave well enough alone, I added random circles and used my machine’s decorative stitches on the edges:


 I love red, too, in combination with almost any other color. Check out these beautiful primary colors of the Dale Chihuly glass sculpture at the Indianapolis Children’s Museum:


What a place! Go there, even if you don’t have a child with you. The Barbie exhibit was a trip down Memory Lane!

My family celebrated our 4th and final wedding of the year in Marion, Illinois, last month. I made a 9-patch quilt for my niece and her new husband. Here it is, on the bed in the hotel room, finished just in time for a last-minute photograph:


I made some cute little wall hangings for the church bazaar, something called “He Was Born in a Manger,” and a one-patch quilt with appliqued flowers:


I finished almost all my Christmas shopping early—via the Internet—and I’ve even wrapped most of it. I have more time to sew! I was working on Christmas quilts last week when my sewing machine broke. I heard a pop and a clunk, and then there was no more reverse. It’s in the shop, 80 miles away, and I miss it badly!

Friday, November 11, 2011

2-year Liversary!

My family is celebrating today--the 2nd anniversary of my daughter Genevieve's liver transplant, or her "liversary," as she calls it. Read what she has to say about it on her blog:
http://pscgenevieve.blogspot.com/2011/11/some-sappy-crap.html

It's been a long haul. We are forever grateful to the family of the organ donor, whoever, wherever you are.

Here's Genevieve, trying on a hat before my niece's wedding last week: