Cutting

Cut 2 squares for the background and 3 squares for the bow tie, as in the picture above. Choose a size depending on the desired size of the finished bow tie. 2½” squares yield a 4” finished block, 3” squares finish to a 5” block, and 3½” squares finish to a 6” block. Contrast is important in this block; make the bow tie dark and the background light, or vice versa. Both light and dark bow ties can be used in the same quilt; it depends on how you want your quilt to look. More about that another day.

Step 1

Fold the center (knot) square in half along fold line 1, wrong sides together. Layer this folded piece on a right-side-up background square, shown above, top. Take a bow tie square and layer it on top, right sides together. I put in a couple of pins here, because the layers tend to shift and slide. Sew all layers together in a ¼” seam, stopping about ¾” from the top edge (above, center). The bottom sample in the photo above is what the bow tie looks like at this point.
Step 2

In the photo above, I have turned my block a quarter turn to the right, shown in the sample at the left. The center sample shows how to open up the center square and refold it along fold line 2 so that corner 2 meets corner 1, wrong sides together. Have the second background square ready to layer on top, right sides together. Sew it as before, stopping about ¾” from the top edge. Open up the bow tie. It should look like this:

Step 3

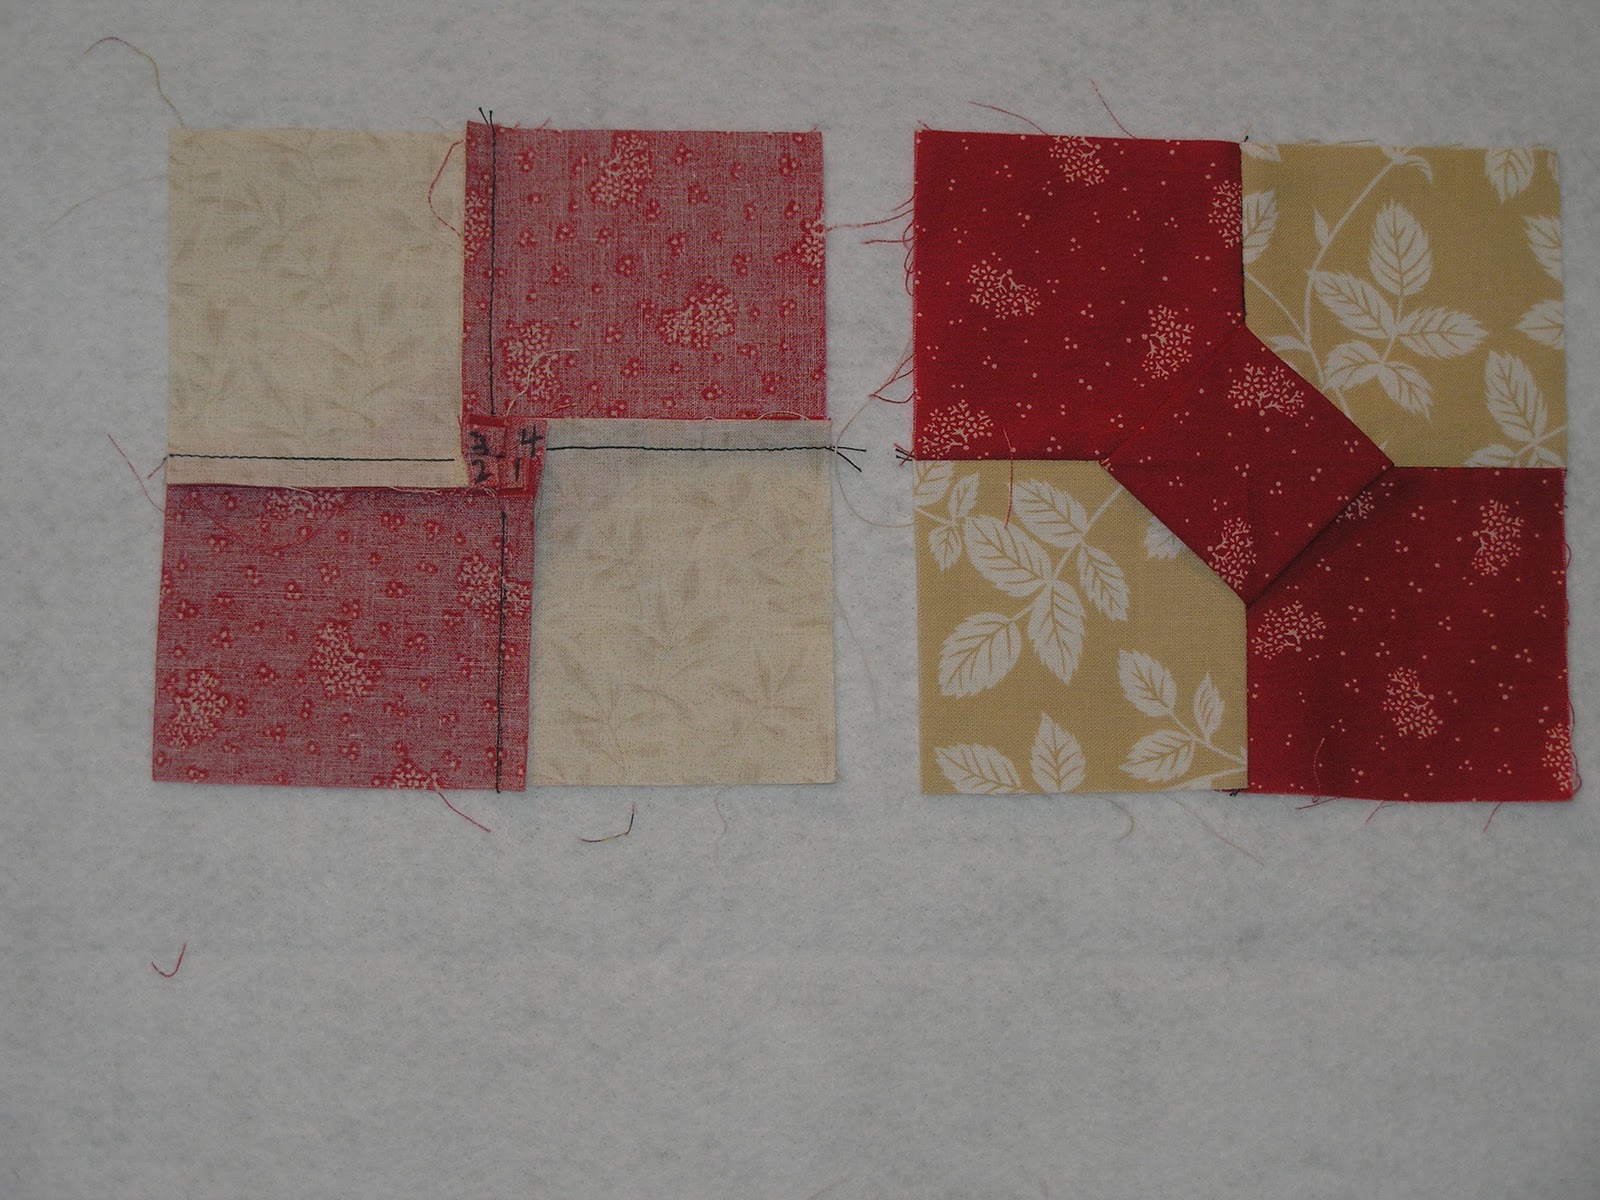
Bring corner 3 to meet corner 2, wrong sides together, folding again along fold line 1, shown above. Sew a bow tie square on top of the second background square, right sides together, stopping ¾” from the edge, as before. The picture below shows how the bow tie looks now (on the left) and after it is opened up (on the right).

Step 4

Now open the center square. It should look like the example above, on the left. Bring corner 4 to meet corner 3, wrong sides together, shown in the example on the right. Fold the background square down over the knot piece and sew the final seam, again stopping about ¾” from the center, shown in the photo below, on the left. Open up the finished bow tie. There will be a small hole in the center on the wrong side.

Pressing
From the wrong side, press all the seams in the same direction, shown above on the left. I press counter-clockwise because I am right-handed and iron from right to left. The seams in the middle will form a nice, neat, flat square with the little hole in the center. The finished pressed block is shown on the right.
If you are working with directional prints such as stripes and it matters to you that the pattern on each piece of the bow tie runs in the same direction, be careful how you place your squares. As you practice, you will be able to stop your stitching about 1/2" from the center instead of 3/4" and this will make the center hole smaller--not that it matters much. You will also be able to make these production-line style. I make 6 to 8 at a time, all step 1, then step 2, etc. I have 109 now. I plan to make a bed-size quilt, something I haven’t done in a long time, and quilt it in sections.
Next--different arrangements of the bow tie blocks.
Nice Article. This Post Written An Excellent. Thanks For Sharing.
ReplyDelete